

Part 2: Finishing and Refinishing Hardwood Floors
In part 2 of 3, we discuss what you need how to sand your hardwood floors. Sanding a Strip or Plank Floor: Tools: Drum sander, edger, nail set,...
2 min read
Replacing a door knob is not very hard. It’s one of the easiest home improvement 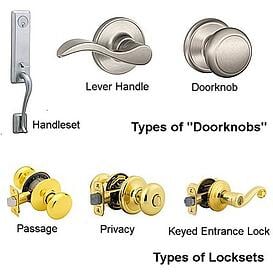 projects anyone can do. Before we get started on a step by step instruction guide, here are some tips and warnings that are important to know:
Tips:
Warnings:
Tools you need:
· The doorknob you’ll be using
· 2 screw drivers a flat head and phillips head.
· Hammer and chisel.
· Safety glasses
· Doorstop or something heavy to keep the door propped open.
· Broom or vacuum to clean up any wood particles.
· Drill and bit in case the opening needs to be adjustment
And finally now for the step by step instructions:
1. When choosing the style of your doorknob, consider where it will be placed (ie. Bathroom, bedroom, closet, etc…). Do you want it to have a privacy lock? Or lever style handles with a locking handle. What direction will the door swing? Just make sure to buy a doorknob that is the same length as the one you’re replacing.
2. Remove the screws on the faceplate. (unscrew counter clockwise to remove)
3. Remove screws on the knob plate. As the handles come loose, be prepared for them to fall.
4. Pull handles off both sides.
5. Push the faceplate and pawl out through the faceplate opening.
6. Loosen screws on strike plate and remove.
7. Some door knobs come with face plate choices. Choose the face plate that matches the opening of your door best.
8. Size up the strike plate and pawl with the holes on your door and door jam.
9. Use the chisel to adjust the door and door jamb if necessary.
10. Now push your new face plate and pawl into the door. Make sure the pawl is facing the way you want the door to close so that the slanted side will meet the strike plate. Pushing the plate in with your hands should do the trick or you can place a piece of wood on the face plate and tap the wood with a hammer so that you don’t damage the faceplate.
11. Screw the faceplate and pawl down as leveled as possible.
12. Insert the handles into the door making sure the square peg fits through the square opening and that the screw holes align with cylinders on the other side. (Make sure levers and locks are facing the right direction!).
13. Insert screws that hold the handle and tighten.
14. Now install the strike plate.
15. Last but not least check that everything fits and is closing properly. Make any necessary adjustments if needed.
And that’s how you install a doorknob and lock. If you’re having trouble or just have questions, leave us a comment below. We will get it right away.

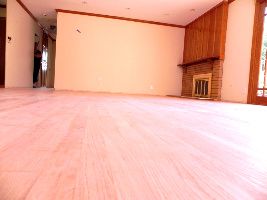
In part 2 of 3, we discuss what you need how to sand your hardwood floors. Sanding a Strip or Plank Floor: Tools: Drum sander, edger, nail set,...

Part 3 of 3 is on selecting and applying the perfect finish to your floors.
Squeaky hardwood floors have a several causes: joists that are undersize or that have become weakened by rot or termites, dried out joists that have...