1 min read
3 min read
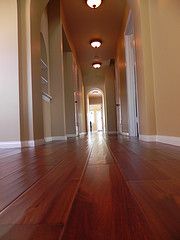
Squeaky hardwood floors have a several causes: joists that are undersize or that have become weakened by rot or termites, dried out joists that have pulled away from the subfloor, inadequate nailing of the subfloor, house settling, wear of inadequate bridging between joists, poor manufactured strip wood flooring, warped floor boards, or sleepers that have come loose from the concrete.
Squeaks in finished wood surfaces may originate on surface areas or in the subfloor. In floors where the materials are anything other than wood laid over the subfloor with make the subfloor squeak. In a typical platform framed home where the joists are exposed, it is a lot easier to locate exactly where the squeaks are coming from. Solving the problem is complex when the joists are not visible or when it is the second floor that is squeaky.
If joists are exposed, watch from below while someone else walks across the floor, you should be able to see exactly where the squeak is coming from. Make sure the bridging between the joists is firmly in place. If you see or feel movement in the joists, call a professional. 
Suggestions:
Tapping in the Shim
Tools you’ll need: Hammer
For minor problems, a simple wood shim will do the trick. The shim is used to eliminate squeaks cause by movement between joists and the subfloor. Once you have located the exact location of the squeak, tap shims lightly into the gaps between the joists of the subfloor. Be careful not to drive it in too hard or it will separate the subfloor from the joists further.
Nailing the Cleat
Tools you’ll need: Hammer
Place a 1x4 or 1x6 cleat against the joist and the subfloor; prop the cleat in place with a 2x4. Tap on the 2x4 so that it will hold the upper edge of the cleat snug against the subfloor. Nail the cleat to the joist with 2 inch nails. Make sure no one is standing directly above while you do this.
If you see movement between the 1x4 and the 2x4, screw them together to stabilize the panels.
Using Screws or Screw Devices
Tools you’ll need: Drill, Screwdriver or wrench
If you have a power screwdriver, you can use drywall  screws
 instead of the wood ones.
Make a pilot hole up through the subfloor with a bit the size of a screws shank. Using a bit slightly smaller than a screws thread, drill a pilot into the underside of the floor. Don’t drill and closer that ¼” of the floors surface. Slip the screw through a large diameter washer and up through the hole. As you tighten the screw, the board will start to pull snuggly against the subfloor.
- If the subfloor is the problem and it is moving, you can screw the plate into the subfloor beside the joist. Hook the bracket over the joist, slide it up the thread rod and use a wrench to tighten the nut until the subfloor and the joist meet the top.
Reseating Loose Nails
Tools you’ll need: Hammer
If squeaking is in isolated areas, you can try to reset loose nails using a padded block. Wrap a piece of 2x4 with an old towel or tack carpeting. Then place it over the squeaky area at a right diagonal of the wood strips. Move the block in a rectangular pattern around the area; tap it firmly with the hammer.
Gluing the Boards
Tools you’ll need: Putty knife
If the space permits it, you can add glue to secure loose floorboards. Most wood strip flooring has little to no space between boards. If your flooring has wide enough cracks, insert a putty knife with white glue and work it into the spaces. The knife will help bind the boards. After adding the glue, push down forcefully and wipe away the excess glue. Put weight on the glued area and leave it to dry over night; books, bricks, or anything heavy. Be sure to lay a sheet down before placing any heavy objects down, this will protect your floor.
Fastening the Boards from Above
Tools you’ll need: Drill, hammer, nailset, putty knife
Surface nailing should be your last resort. Drive ring-shank nails a slight angle through the flooring into the subfloor or if possible into a joist. Drill pilot holes smaller than the diameter of the nails, this will reduce the risk of splitting boards and will make it easier to counter sink the nail heads. Select a wood putty that matches the finish of your floor and fill the holes.
Anti-Squeak Lubricants
There are several different types of lubricants that reduce friction between floorboards and can be applied to the surface to eliminate the squeaks. This remedy is good for floors that cannot be accessed from below. Here are the options:
Powdered or Liquid Graphite- Squirt the graphite between the boards. It will make its way down to the tongue and groove joints. Use this sparingly; graphite is messy and you don’t want to track it across the floor.
Talcum Powder- Dust the powder between the boards and wipe excess with a damp cloth.
Floor Oil- Apply liberally over the squeaking area and wipe the excess with a dry cloth. The oil will soak down into the cracks and will expand the wood causing it to tighten and stop the squeaking.
Mineral Oil- Use in small amounts; the mineral oil will eliminate friction between the boards. Apply a few drops into the cracks and that should take care of it. Applying too much mineral oil will stain the surface of your floor.
Well will be posting a segment on squeaky stairs soon. Floors and stairs are handled slightly different. For more info on taking care your squeaky floors, please don’t hesitate to ask.